
SCSI2SD
SCSI2SD
SCSI2SD is an approach emulating SCSI hardware with software running in an PSoC microcontroller from Cypress. An ARM Cortex M3 controller is provided as part of the PSoC, and furthermore a bunch of programmable system parts, e.g. usable for interfaces etc. Focus is on mass storage, so SCSI2SD can emulate hard drives and other mass storage devices, all on a SD card. Main website is http://www.codesrc.com/mediawiki/index.php/SCSI2SD .
Alternative PCB layout, specialized for Powerbook hardware, but can be used for general SCSI purposes too: https://www.eltradec.eu/index.php/de/project-scsi2sd-de .
Nice page with all steps required to build and config SCSI2SD: https://oldcrap.org/2020/08/04/scsi2sd-hdd-emulator-diy/
Eltradec page with additional hints: https://www.eltradec.eu/index.php/de/projects/29-guide-scsi2sd-de
User Manual: http://www.codesrc.com/mediawiki/index.php/SCSI2SD_UserManual
I read that it is possible to use SCSI2SD together with a MicroVAX and other retro computers, so I ordered one.
Solder hints
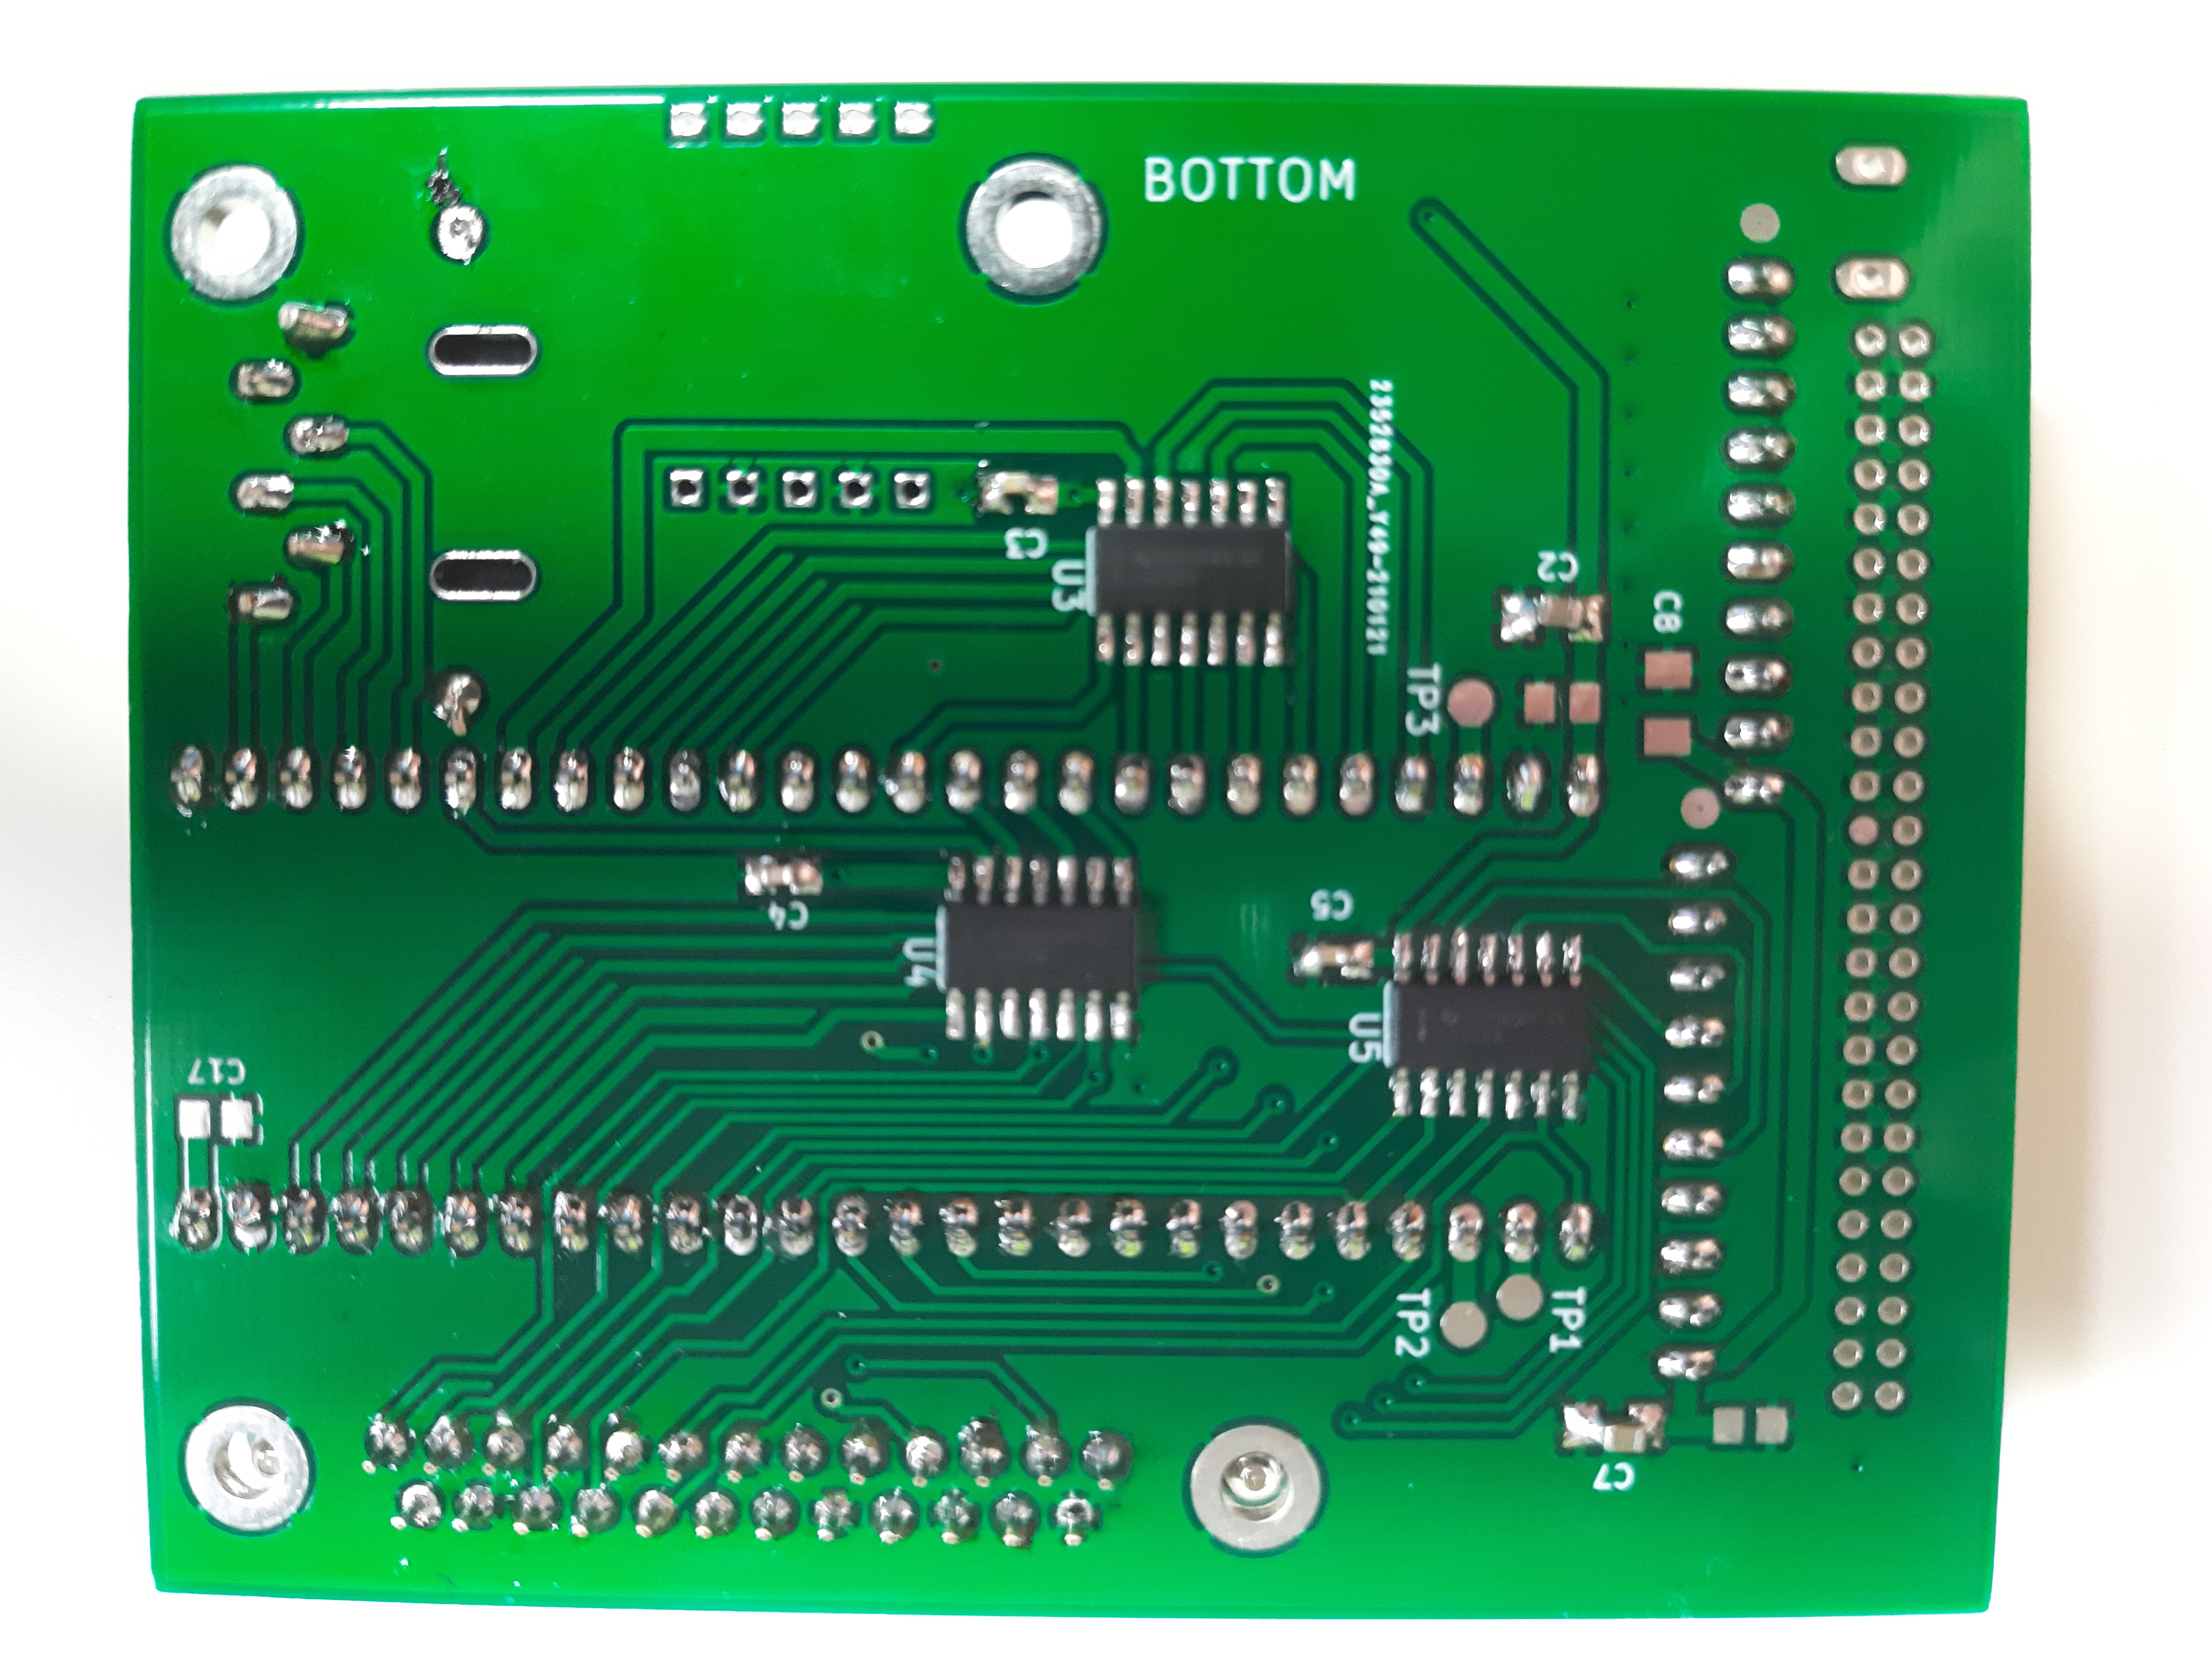
Just additional information on soldering. Of course, U2, U3, U4, U5 need to be soldered in.
On bottom side C3,C4,C5 with 0.1µF need to be soldered. Also C2 and C7 (10µF).
Next image: PCB, with U3-5 and C2,3-5,7 already soldered in.
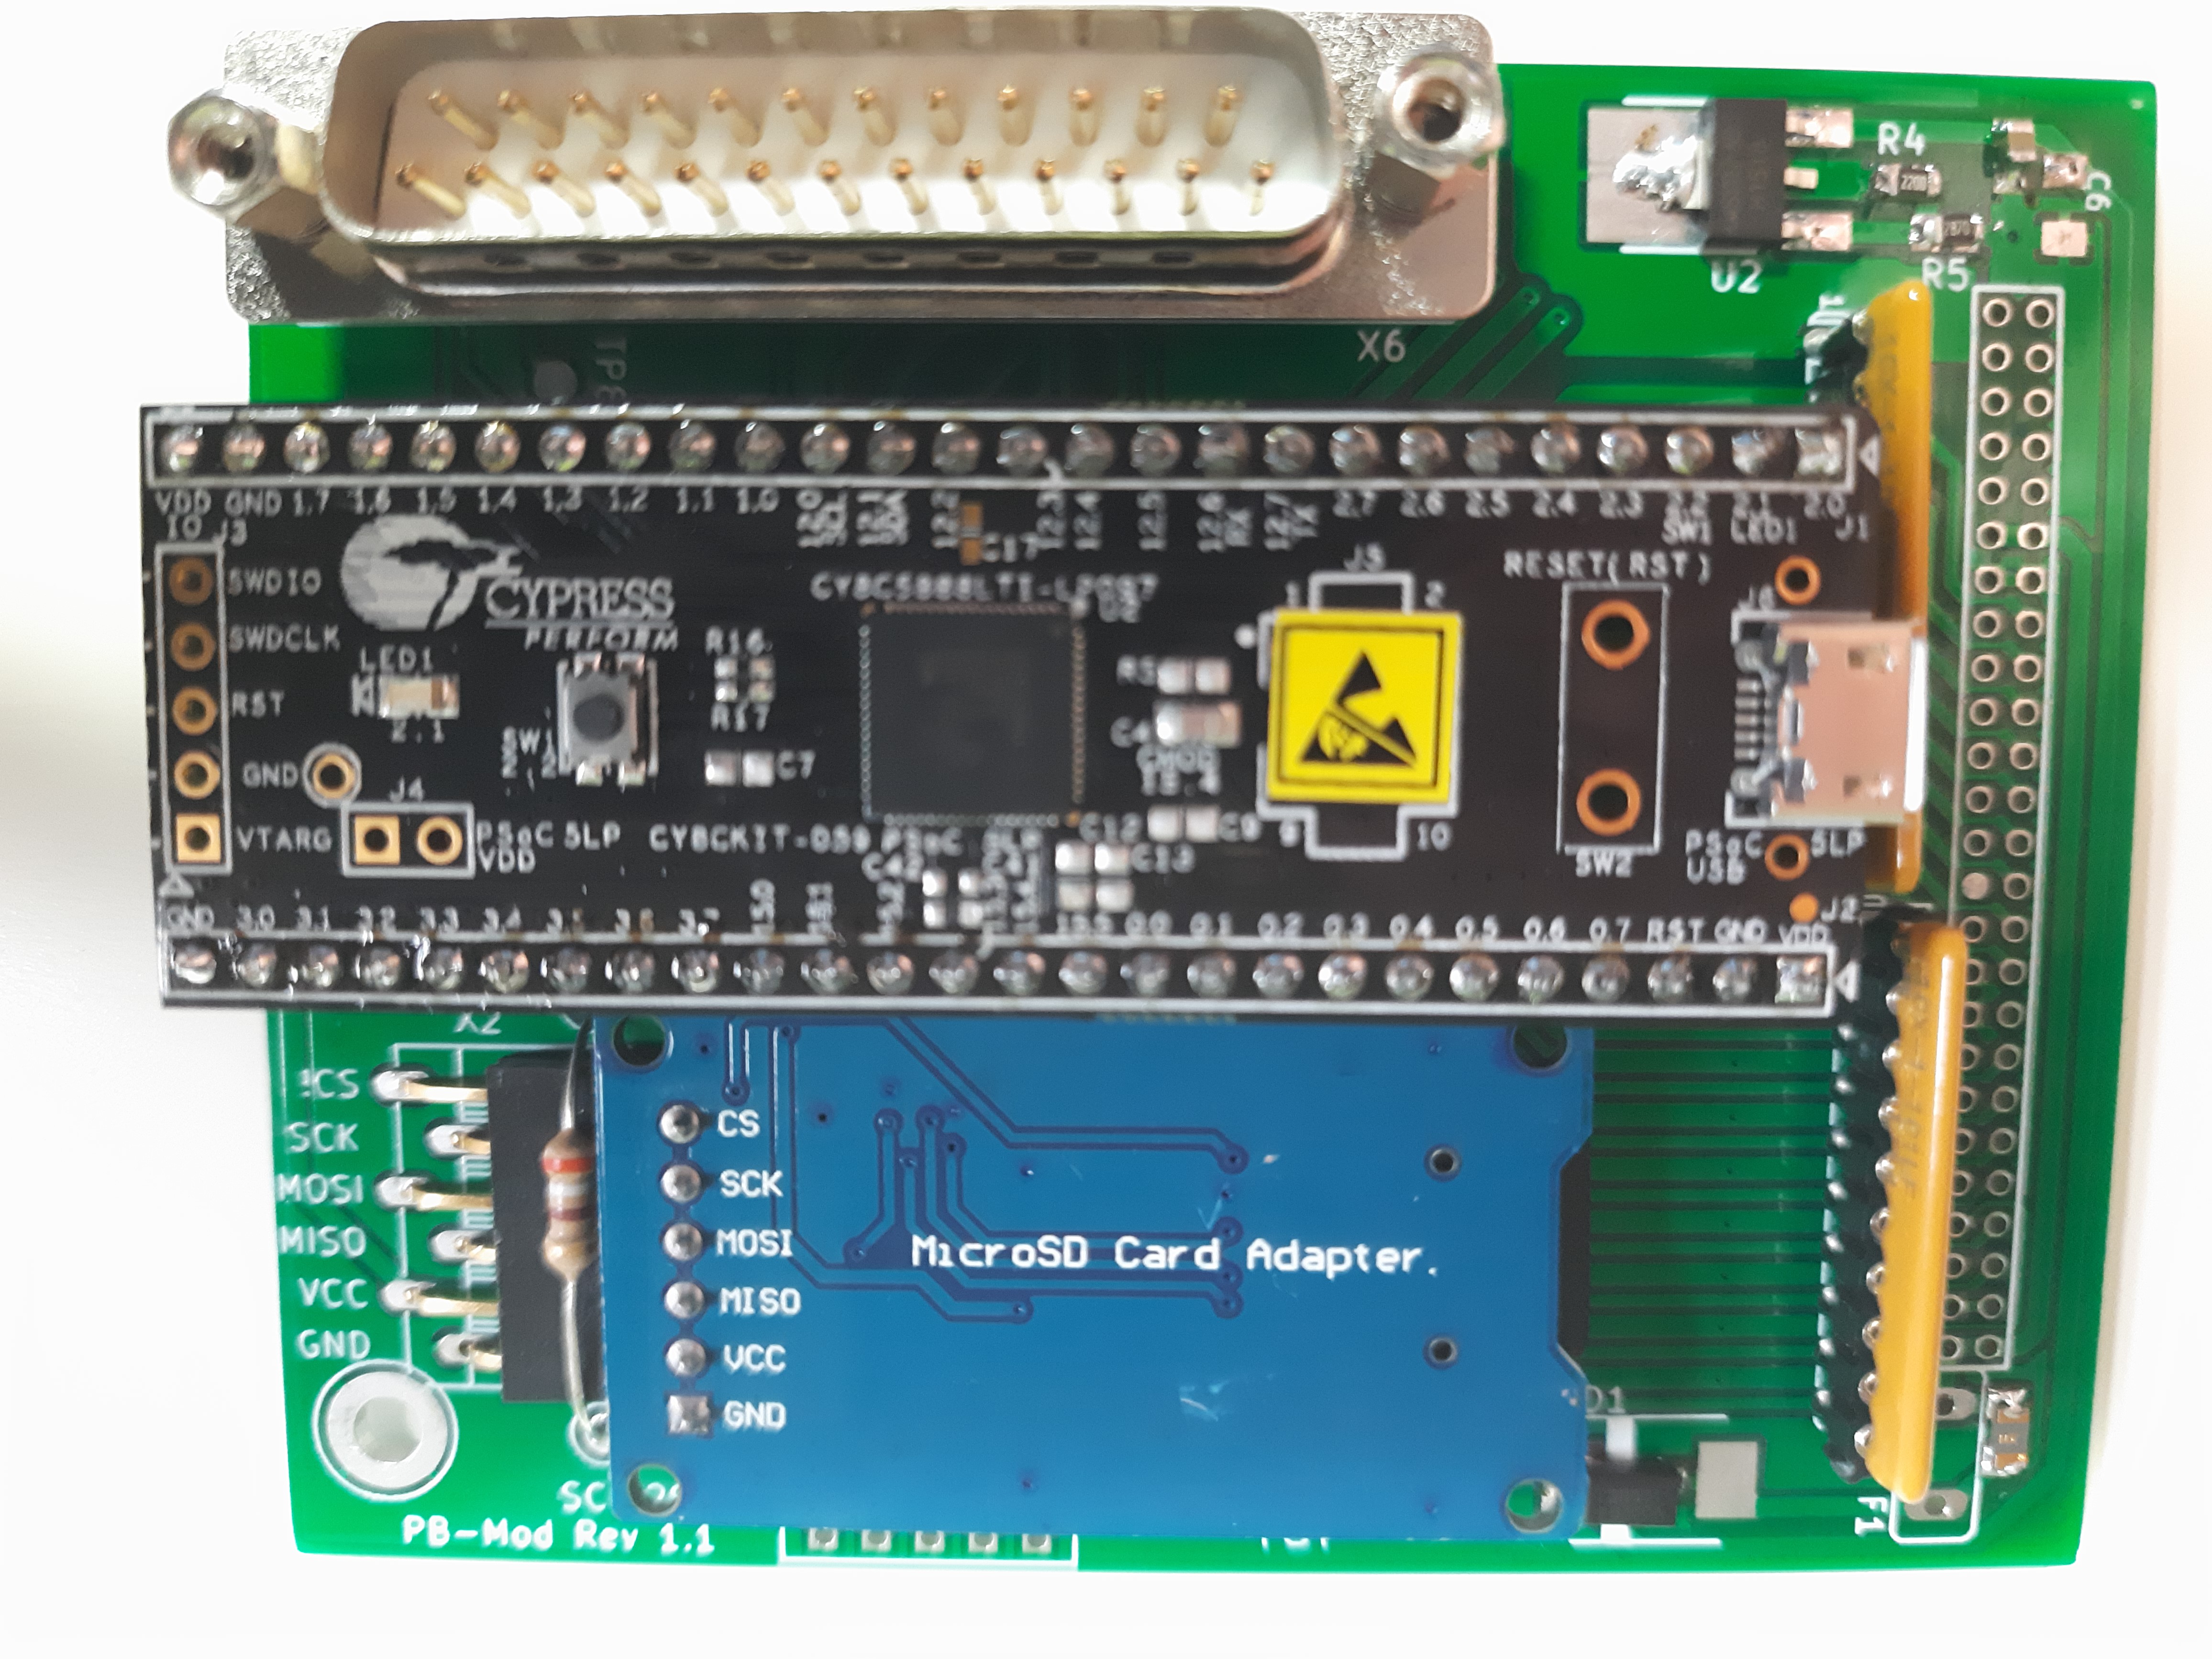
On top side, R4 (220 Ohms) and R5 (287 Ohms), fuse F1, C6 (10µF) and D1 need to be soldered.
For the terminator resistor arrays, its best not to solder them in directly, but to use sockets. Same for the PSoC PCB. DB25 connector if needed, need to be a female type.
The main connector X1 is a Apple powerbook specific pin arrangement. If you do not intend to use it for a powerbook, the connector coming with the board is somehow useless and need not to be soldered in. Then only DB25 connector is being used.
Next image: All parts soldered in.
Software
After building hardware, the device needs to be configured (up to 4 devices like hard drives can be configured and will live independent on SD card).
The software runs on Windows/Linux/Apple, for linux it is called scsi2sd-monitor (does checking the hardware only) and scsi2sd-util to do the configuration. There is an udev rule to be installed:
> cat /etc/udev/rules.d/99-hidraw-permissions.rules
KERNEL=="hidraw*", SUBSYSTEM=="hidraw", MODE="0666", GROUP="plugdev"
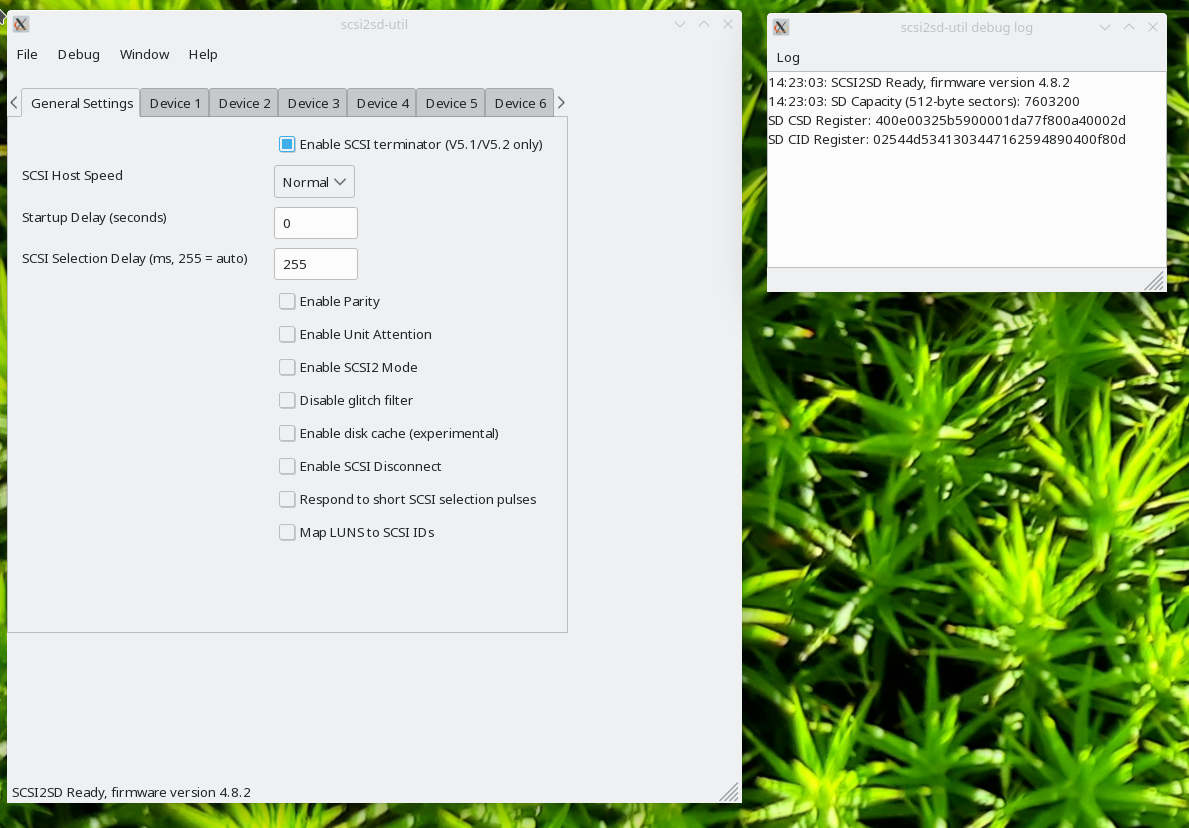
Next image shows scsi2sd-util after start. It shows that it has
successfully connected to the SCSI2SD hardware, and detected there
a version 4.8.2 firmware.
An preformatted SD card with HFS and 1 GB was inserted (part of build kit).
Moving image files from and to SCSI2SD SC card
SCSI2SD uses the SD card by accessing blocks on it directly. So, from the SCSI2SD perspective, there is no structured data on the SD card, just blocks.
As an example: I have created 4 virtual drives on my SD card. These are located on the SD card in the following way:
| Drive SCSI ID | Start Sector | Sector Count | Size |
|---|---|---|---|
| 1 | 0 | 1024000 | 500MB |
| 2 | 1024000 | 1024000 | 500MB |
| 3 | 2048000 | 1024000 | 500MB |
| 4 | 3072000 | 1945600 | 950MB |
So start sector of drive n+1 is sum of start sector of drive n + sector count. (These values do not need to be calculated by user, SCSI2SD does it in “auto” mode.)
Knowing this, it is possible to copy disk images (ISO and DSK files) to and from the SD card. On linux, usually dd does this job.
I have tested this only for MicroVAX, and it can boot from disks copied in that way. I do not know if this works for other platforms too in the same way.
Let’s assume in the following examples that /dev/sdb is the SD card. Check
this using dmesg tool after inserting the SD card to Linux PC.
Reading images
Reading SCSI drive 1 image from SD card. In most cases we use as value
for parameter count
the size of the disk drive as can be seen in the table (i.e. 1024000).
skip is the offset in blocks to start with read operation and
equals to start sector value of table above.
# whole disk backup before applying Y2K patch
dd if=/dev/sdb of=ultrix45_base_install.dsk bs=512 skip=0 count=1024000 conv=fdatasync
Writing images
Writing to SCSI drive 1 on SD card. We need to define start sector using the
seek parameter of dd command. For drive 1 this parameter is zero, as can
be seen in table above:
dd if=NetBSD-2.0/vaxcd.iso of=/dev/sdb bs=512 seek=0 conv=fdatasync
dd will print out number of bytes written from input file. Of course, input file must have smaller or maximum equal size than target drive.
And for another installation, that does not start at sector 0, but at sector 1024000 (this is SCSI drive Id 2):
dd if=ultrix45-1024000-1024000-w-freeware.dsk of=/dev/sdb bs=512 seek=1024000 conv=fdatasync
Further reading
- Using SCSI2SD on PDP11 - https://avitech.com.au/?page_id=2735 . This page also
describes how to move disk images from Linux to an SD card using
ddcommand.